Download Panzer III Ausf L,M by George Parada, Robert Wroblewski, Waldemar Hryniewicki PDF

By George Parada, Robert Wroblewski, Waldemar Hryniewicki
Read or Download Panzer III Ausf L,M PDF
Similar toys & models books
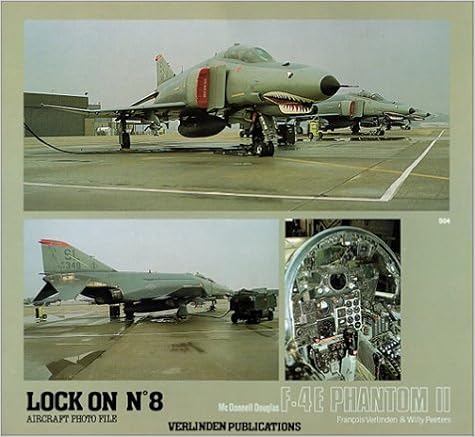
Lock On No. 8 - McDonnell Douglas F-4E Phantom II
Smooth disguise 36 pages a hundred complete colour photos five USAF technical drawings The 8th installment within the LOCK ON sequence, this quantity highlights the vintage gun-nosed McDonnell Douglas F-4E Phantom II. sporting on the LOCK ON culture, this publication is loaded with a wealth of details within the type of appealing complete colour photos with hugely descriptive captions.
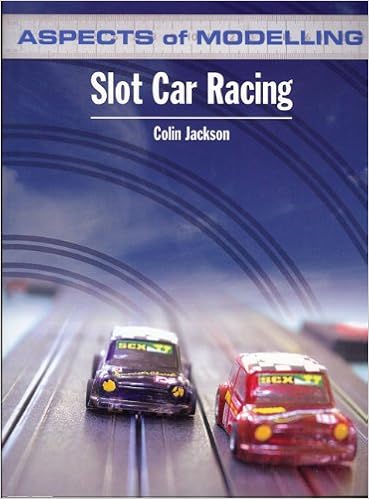
Aspects of Modelling: Slot Car Racing
Construction at the approval for the features of Modelling sequence designed essentially for railway modellers, Ian Allan Publishing is extending the assurance of the sequence to surround different pastime modelling parts. the 1st of those titles appears to be like intimately at a space of accelerating popularlty all over the world, that of slot motor vehicle racing, that is practiced either at an prepared membership point, but in addition at domestic utilizing Scalextric and different related brands' items.

German combat uniforms, 1939-1945
An international battle army historical past

Making Miniature Flowers with Polymer Clay
With Quast's petal-by-petal demonstrations, a person can discover ways to make soft, miniature plants excellent for jewellery, bins and extra.
- Republic P-47D
- Making and Dressing Miniature Teddy Bears
- Battleship Scharnhorst
- Encyclopedia of Military Models
- Making Dolls and Dolls' clothes
Extra info for Panzer III Ausf L,M
Sample text
Wedge from the side. As an alternative, use a disk sander to bring the faces down to the lines parallel to the hole. Now the blank is ready for the axle hole. 3 On one of the parallel faces, draw a line parallel to the side of the center hole. Then lay the blank on the other of the two parallel sides and drill a hole for the axle. A 3⁄8-in. hole for an 11 ⁄32-in. 5mm hole for a 9mm axle) should work well. Drill the hole next to the line and away from center. I make the axle hole slightly toward the head of the bug, but the location isn’t critical.
28 things we forget ( but shouldn ’ t ) Starting a cut with a gouge. With a spindle or detail gouge, roll the tool on its side so the cutting edge is supported. Spindle roughing gouges can be started flute-up. On endgrain, always start a gouge on its side. Gouge catches happen when the wood exerts pressure on an unsupported edge, as shown in the drawing above. So never start spindle or bowl gouges with the flute up. Tilt a scraper down to avoid a catch. Scrapers catch when the angle between the top of the edge and the surface being cut is more than 90 degrees.
Stop the lathe and ascertain the cause or origin of any sound you don’t recognize. Hollow sounds indicate splits or loose bark, for instance. A shriek as you turn on the lathe usually means the spindle is locked and the belt is slipping. It wears the belt but is no big deal and not dangerous. Never use scrapers for spindle turning. That will leave you with a lot of sanding. Scrapers on spindles never do a good job unless the wood is really hard; even then, cutting tools are far superior. Abrasives do not become finer with use.